This guide is here to help. It’s a clear framework for homeowners. We will walk you step-by-step through the main questions. We’ll cover the first question about your roof. We’ll also cover the important safety parts, including module clamps, that keep your system running for a long time. Maintaining waterproofing after installing solar panel mounts on a roof is vital—this involves using flashing and sealants around the mounts, inspecting all penetrations to make sure they are fully sealed, and following best practices for rooftop installation to prevent leaks. Regular inspections after installation are recommended to ensure that the waterproofing remains intact over time.
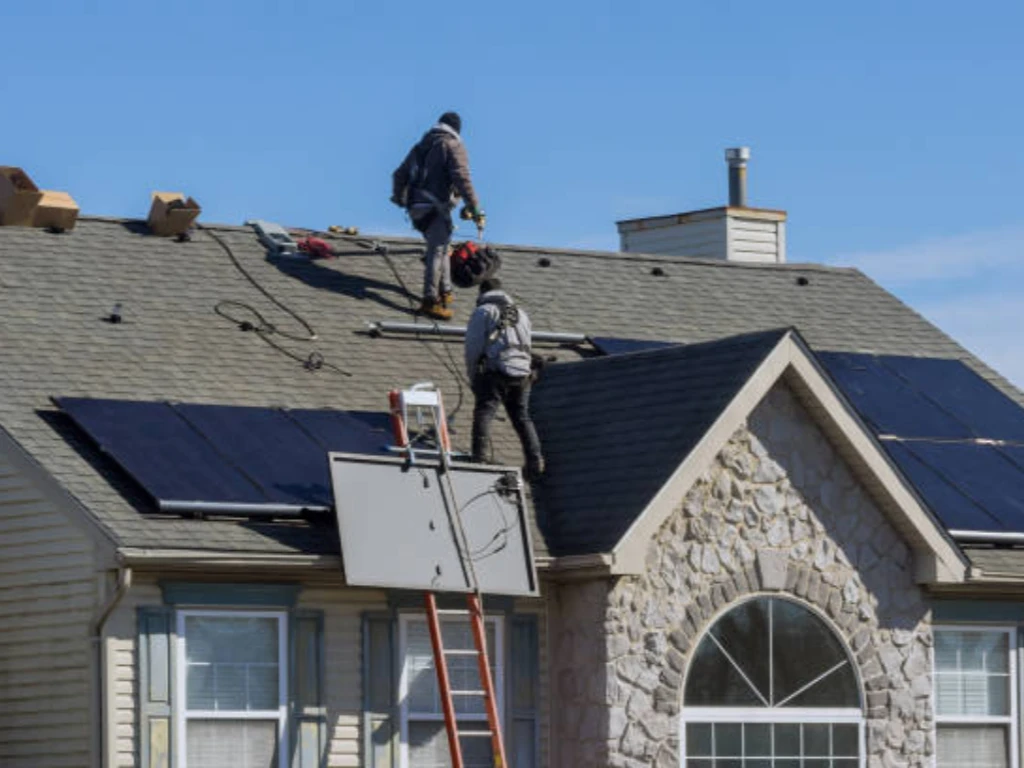
You have to check your roof before you receive a price to make sure that you are producing the best energy. Your roof is the foundation for the panels. It is not a good investment to install a $20,000 solar system on a roof that is old and costs $5,000. It is putting a new house on a shaky foundation. The first and most important thing to check is the condition of your roof. Speaking of the mounting of solar panels, one should mention that residential and commercial roofs are different. The roofs of residential buildings are usually sloped and constructed using such materials as shingles, which might need certain mounting equipment and a thorough evaluation of age and condition. Commercial roofs tend to be flat and can be made of other materials or need ballasted mounting systems, which means that the installation process and structural analysis of the two types can differ greatly.
Think of this as a physical check-up. Your roof must be in good shape. It needs to support a solar system for 25 years or more.
The material on your roof decides how to install the panels. It also affects the cost and long-term risks.
To help you visualize the differences in solar panel installation, here is a quick comparison:
| Roof Type | Installation Method | Key Risk Factor | Relative Cost / Complexity |
|---|---|---|---|
| Asphalt Shingle | Drills into rafters; uses flashing. | Potential for leaks if not sealed properly. | Standard |
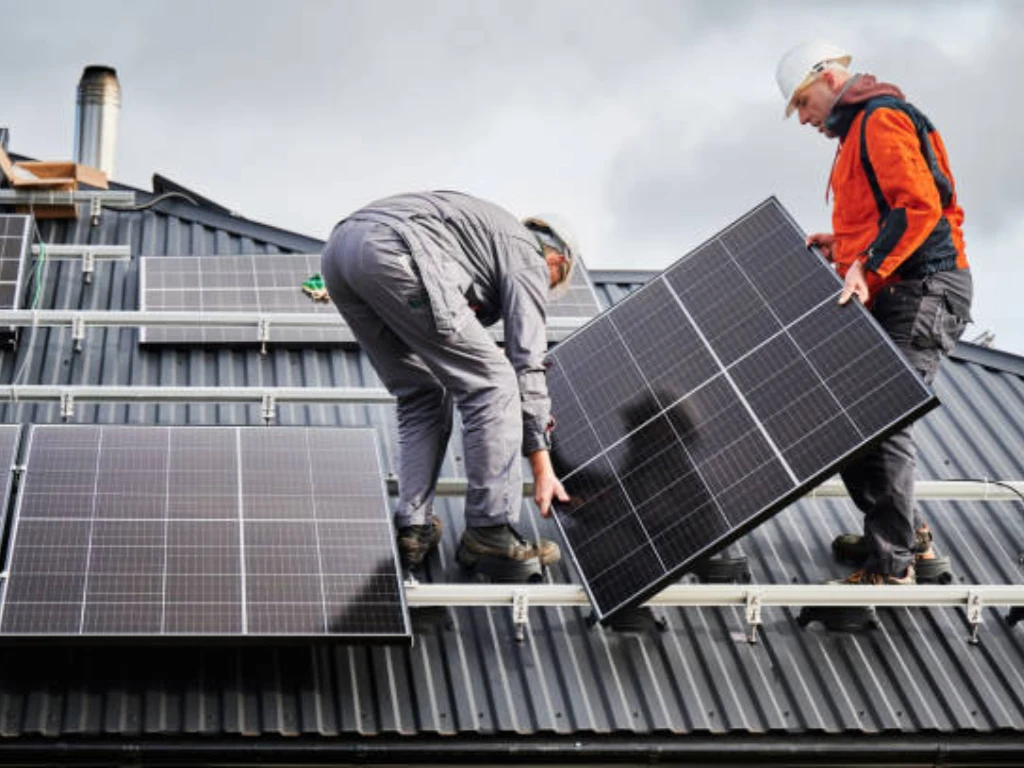
| Standing Seam Metal | Clamps attach to seams; no holes. | Virtually no leak risk. | Standard (and preferred) |
| Clay / Concrete Tile | Tiles removed; special hooks attached. | High risk of tile breakage; complex. | High |
| Flat Roof | Tilted, ballasted (weighted) mounts. | Requires structural weight assessment. | Medium-High |
With the physical hurdle of your roof cleared, you now face the financial one. Solar power is an equation. On one side, you have a significant upfront investment; on the other, decades of potential returns. Before you can appreciate the reward, you must have a transparent, unvarnished look at the cost. This section is designed to give you the tools to solve that equation for yourself. First, let’s look at the total cost. Prices can be different based on where you live and the system size. A normal 6kW to 10kW system usually costs between $15,000 and $25,000 before any savings, which can help reduce your utility bills. To compare prices from different installers, you need to use Cost per Watt ($/W). This is the best way to compare.
This single number allows you to make an apples-to-apples comparison. When you receive a quote, you are not just paying for panels. The total cost is a bundle of parts and services. Here is a typical breakdown of what your money pays for:
| Component / Cost Factor | Approx. % of Total Cost | What It Is |
|---|---|---|
| Solar Panels | 25% – 30% | The visible panels that capture sunlight. |
| Inverter(s) | 10% – 15% | The “brain” that converts DC power to usable AC power. |
| Racking & Mounting | 10% | The “skeleton” (aluminum rails, clamps) that secures the panels. |
| Labor & Installation | 15% – 20% | The cost of skilled, certified professional installation. |
| Permits & Fees | 5% – 10% | Administrative costs for city and utility approval. |
| Safety Components | 5% | Critical hardware (disconnects, breakers, surge) for safety. |
| Other (Supply Chain, Overhead) | 15% – 20% | Installer’s operational costs, engineering, and profit. |
Now, let’s figure out your Return on Investment (ROI). You get your return in three main ways:
Your Payback Period is the time it takes for your savings to equal your initial investment, taking into account the age of your roof.
Your Payback Period is the time it takes for your savings to equal your first cost. A common payback time in the U.S. is 8 to 12 years. Since solar panels are guaranteed for 25 years, this means you can enjoy more than 10 years of free electricity.
The total cost mentioned in the previous section may seem high. However, no homeowner will pay the full amount. There are relevant financial incentives to reduce your expenses. This is why solar energy can be a worthwhile investment.
A solar system has two jobs. The first is to make power. The second is to be entirely safe and legal throughout its 25 years of existence. A system that fails to comply with the intricate network of safety codes may not be permitted to be connected to the grid. Worse still, it may be a major safety risk.
A solar installation should be demonstrated to be safe. This is achieved by adhering to the regulations of various groups. These regulations are sometimes complicated and difficult to follow. The following are the main codes and standards:
| Code / Standard | What It Is |
|---|---|
| NEC (National Electrical Code) | The main U.S. safety rulebook for all electrical work. |
| UL Certification | A product safety test. It proves a component is safe to use. |
| Local Authority (AHJ) | Your city or power company’s own rules, which can be even stricter. |
While these regulations are complex, they exist to solve critical problems. Beyond the obvious panels and inverter, a system’s 25-year safety depends on critical components designed to handle three specific risks.
Ultimately, the 25-year safety of your investment rests on these high-grade, certified protective parts working together.
After understanding your roof, costs, and the critical safety components involved, you face the biggest decision: who will actually install the system? This choice affects both your final budget and your system’s long-term safety. While saving thousands on labor is tempting, this is not a simple weekend project. It is a complex electrical installation with 25-year consequences.
| Factor | DIY Installation (The “Savings”) | Professional Installation (The “Security”) |
|---|---|---|
| Upfront Cost | Lower (You save on labor) | Higher (You pay for expertise) |
| Electrical Safety | Extreme Risk. High-voltage DC is dangerous and can cause arc faults (fires). | High. Certified electricians handle all wiring to code. |
| Roofing Safety | High Risk. Improperly sealed penetrations are a top cause of major roof leaks. | High. Installers are roofing pros who guarantee their work is watertight. |
| Component Warranties | Likely VOID. Most 25-year warranties are voided without certified installation. | Fully Intact. All manufacturer warranties are preserved. |
| Time & Effort | Extremely high (Weeks or months of research, permits, and labor). | Minimal (Installer handles 100% of the process). |
| Permits & Inspection | Your full responsibility. A complex and frustrating process. | Handled entirely by the installer. |
Considering these elements, the DIY savings are a temporary illusion. The potential costs from a voided warranty or a single, slowly-developing roof leak can dwarf any initial labor savings, making it not the best time to consider DIY methods. The risks are not just financial. This is not your standard 120V AC home wiring. Solar panels generate high-voltage Direct Current (DC), which is a different, more potent animal. It does not “let go” like AC can and is far more prone to creating a sustained, high-heat arc fault—a primary cause of solar-related fires. One wrong connection can be catastrophic.
Having grasped the fundamentals of cost, sunlight, incentives, and component safety, the project moves from theory to practice. Professional installation is a meticulously planned process, not a single event. The following are the steps.
“Turning on your new system feels like the end. But it is really the starting line of owning your power. Your system is a 25-year asset. It is strong, but you cannot just “set it and forget it.” You need to know how to watch it and keep it working well.
© 2025 Solar Installation Guide – Professional Solar Solutions